Marksmanship - An Essential Skill
by Rick Basagoitia, CPW Area Wildlife Manager
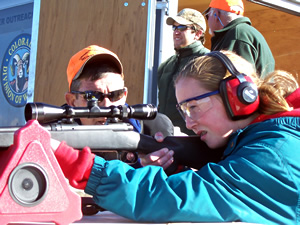 When hunting elk (or any other big game animal for that matter), there are a few things that are essential for a good hunt. If you go through your average sporting goods store or hunting catalog, you’ll find things to buy to meet every whim imaginable. However, the bottom line is that good equipment is great, but even the best equipment won’t automatically give you the skill to be a good hunter.
Marksmanship is one of the most important skills that every hunter should develop and work toward improvement over an entire lifetime.
"Trigger time" is very important. Practice, practice, practice! You might be thinking a few things right now. "Hey, I do practice a lot" or, "How can I afford to practice a lot with ammo costing so much?" If by your definition of practice you sit at the bench and poke holes in paper, this won't help you very much as a hunter, unless you plan to bring that bench with you into the field.
No? I thought so!
By practice, I mean getting off the bench and utilizing the shooting skills that you will actually use in the field. This article focuses on helping hunters—novice or experienced—become more proficient and on teaching the skills needed to do that. The skills presented here are the basics. They are all you need to be successful, but they are "perishable". You must continually practice to hone your skills or you’ll lose them.
The fundamentals of marksmanship are actually quite simple. The following list enumerates each fundamental and gives some key points for each that should be incorporated into every shot, both real and practice.
Natural Point of Aim (NPA): There are two principles at work here, the rifle becoming a non-movable body part, and bone support/muscle relaxation. NPA relies upon the idea that the rifle is a part of your body. Once the rifle is mounted and in your shoulder pocket, it is not an independent part of your body that should be moved around, like your arm for example. It is more like your nose on your face. In order to move your nose, you must move your whole head. Therefore, in order to move your rifle, you must move your whole body. Keep adjusting until your sights come to rest on your target—after you are in position and have relaxed the muscles in your whole body.
Sight picture: Most high-power rifles utilize a telescopic sight, so I'll focus on the use of a scope. Sight picture is lining up the reticle on your target while ensuring that there is no shadowing within the scope. Edge-to-edge clarity is the rule. If you are looking through a small hole with a large dark circle or any shadows around the edges of your scope your eye placement/eye relief must be adjusted.
Breathing: Breathing causes your body to move, but holding your breath causes your body to shake. You should fire while you are in your natural respiratory pause at the top or the bottom of your breathing cycle. Consciously breathe deeply in and out. You’ll notice there are natural pauses between breathing in and breathing out and breathing in again. It's at the pauses that you take your shot.
Trigger control: Squeezing the trigger should be a smooth, deliberate act that is timed to coincide with a perfect sight picture and a natural respiratory pause. If all three are not present and perfect, don’t break the shot. In order for the trigger squeeze to not alter the sight picture—resulting in a thrown shot—it must be squeezed smoothly, straight to the rear of the rifle. Any sideways pressure from your finger will cause unwanted sideways movement in the rifle.
Follow through: Follow-through is no more than holding the final firing position through the entire recoil cycle. This ensures that the rifle remains lined up with the target as the process of firing the bullet down the barrel and out of the muzzle occurs.
First things must come first. So, before going any further, you must ensure that the rifle and its sights are aligned properly. This is accomplished through the process of sighting-in your rifle. Too many people take their rifle to the gun shop, have it bore sighted, and think they are good to go.
Wrong! Bore sighting does nothing more than get the bore of the barrel and the line of the sights somewhat lined up. It still must be sighted-in or you wasting your time and Colorado’s wildlife.
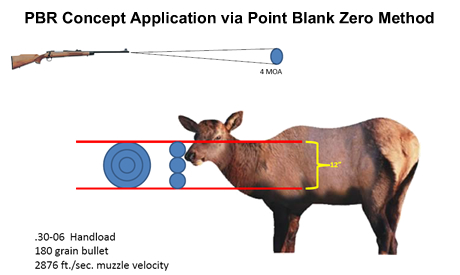
There are many opinions on how to properly sight-in a rifle. One way I’ll discuss here is using a Point Blank Zero (PBZ). This means taking advantage of the trajectory of your round so that for a particular target size you can hold dead-on out to some known distance and hit your target.
TV teaches us that wherever the reticle lies on the target that is where the bullet will impact. In real life, however, this is true only for two set distances. The first is where the bullet, propelled up into the air as it leaves the barrel (because the relationship of the barrel to the line-of-sight through the scope is an upward angle) and crosses the line of sight the first time. The bullet travels downrange and continues its climb in relation to the line-of-sight until gravity pulls it out of its vertical climb and it begins to drop, crossing the line-of-sight at a more distant point somewhere down range. (See the illustration.) The bullet will keep traveling along this arc (trajectory) until it hits an object or the ground.
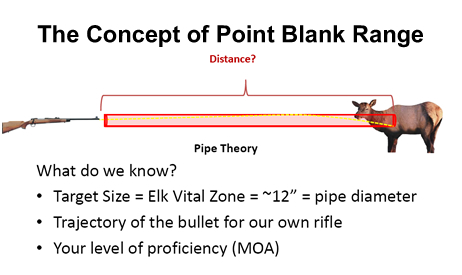
Most mid-range big game rounds used to hunt elk (which have a 12”-14” vital area) can be sighted-in so that you can hold dead on the animal’s vitals and make good hits out to about 250 yards. To do this the typical sight-in scenario at 100 yards would be for the point of bullet impact to be about 3 inches above the point of aim. This will have the bullet cross the line-of-sight the first time at about 25-30 yards and the second at 240-260 yards. You’ll have to do the research for your own rifle/cartridge combination because all of them behave a little differently. A Google search for "point blank zero" will help you find additional information on the topic and help you set up your rifle properly.
There are numerous targets available that are designed for sighting-in your rifle. Most have a one inch grid to help you figure out how to adjust your scope. Once you know what your point of impact should be at 100 yards for an elk-sized target, you can begin sighting-in. Let's say your point of impact should be 3.5 inches high at 100 yards. Place your target out at 100 yards from you firing position. The correct distance is important, so measure it.
You can use a bench at this point, but it is preferable to sight-in using a prone position you might use while hunting. Either way, begin by aiming at the center of the target and employing the fundamentals of marksmanship for each of 3 shots. Your bullets will likely impact somewhere other than the center. Determine the center of the three shot group. If you don’t have a group, or one larger than 6 inches, there is no point adjusting the scope because you’ll accomplish nothing. Keep practicing; you’ll get better.
Unless you have major equipment issues, you should soon be able to attain 3-inch groups or better. If you have to, reduce the range to get "on paper" and begin establishing groups. Then, work to get out to 100 yards so that you can finish the process.
Once you have a definite group, determine the center of that group and adjust the scope turrets (read your scope’s literature for help with this) to move that center of the group to your 3.5-inch-high zero point. Use the same point of aim as before (center target) and shoot another three-shot group. Make any needed scope adjustments. Once you think you are where you need to be, shoot a five-shot group to double check. Once you are satisfied with your placement you can move on.
Now that your rifle is sighted-in, you can focus on becoming proficient at the fundamentals in a hunting context; I'll discuss the positions you’ll likely use to shoot while in the field. Laying your rifle on the ground and not touching it is the most stable position it can be in, but it’s a little tough to shoot it that way! I say this facetiously, but it is not far from the truth. Ground contact is important!
 The most stable position that the hunter can use in the field is the prone position. It is even more stable if you can support the weight of the rifle on a bipod, sand bag, or backpack. Unsupported prone, using just your arms and hands to hold the rifle up off the ground, is less stable. Supported prone is probably the most stable field position, but is likely to be the position you find yourself least likely of being able to utilize while actually in the field. Too often, grass, brush, and topography are such that you have to get higher off the ground in order to see your target. Understand that the higher off the ground you get, the less stable the shooting position is going to be.
Besides prone, there are a number of useful field shooting positions. In order of lessening stability and contact with the ground, they are sitting, kneeling, and standing.
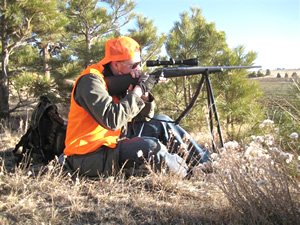 There are numerous variations on the sitting position, both supported and unsupported. A key point to this—and to all shooting positions—is that it has to be comfortable to you! If you can’t relax your muscles and hold the position, it won’t work for you. Keep adjusting the position until you find a hold that allows you to relax your body, maintain your sights on the target, and maintain that position throughout the firing cycle. The principal being attended to here is bone support and muscle relaxation. Let your bones hold the position; muscles get tired and will begin to shake, making a steady shot very difficult to achieve. The more ground-to-bone-to-rifle contact you have the more stable you will be. Also, don’t rest the point of your elbows on the points of your knees. This type of joint-to-joint contact tends to want to roll, compromising stability. Instead, place the meaty portion of your arm on your knee or your elbow on the meaty portion of your leg.
Supported sitting positions can be accomplished by using one of any number of supports: bipods, shooting sticks, trees, etc. The same principles apply and the added support under the forend of the rifle helps make the shot much more stable. You’ll notice I said “forend”. In no case, should you ever rest the barrel on a support or allow it touch anything but air. Touching the barrel to something will affect the vibrations that occur during the firing process and will result in a shift of your bullet impact. Most often the shift will be significant.
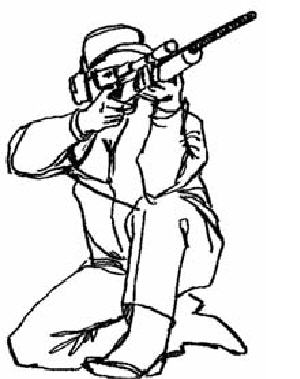 The
kneeling position works the same way. It is just a little higher off the ground and will be slightly less stable for that reason. Find a comfortable position that you can hold while you allow your body to relax. Be conscious of the joint-to-joint contact issues. Supporting this position with shooting sticks or other such supports will increase your contact with the ground and your stability. With a support, you can have both knees on the ground, or you can raise your gun-side knee, to provide additional support for your elbow.
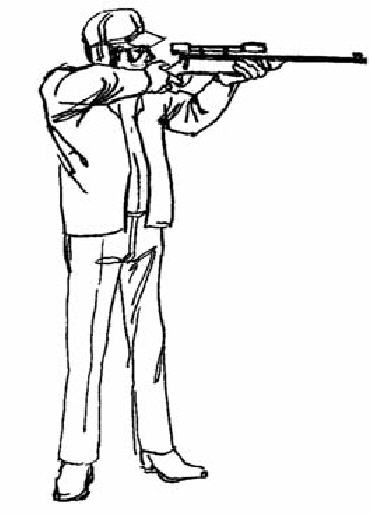 Standing is the least stable position. However, using an appropriate support for the rifle may make it more stable. Trees, rocks, long bipods or tripods, or other stable supports with good ground contact are an absolute necessity to make a steady shot from this position. Unsupported standing positions should not be used when attempting to take game. It is just too unstable, and, in many cases, unethical.
A final key to positional shooting is that
you must practice from these positions. Once you have sighted-in your rifle, get off the bench and start practicing shooting from various positions, both supported and unsupported. Using reactive targets that are sized similarly to the vital area of the animal you like to hunt will help you make the most of your practice. Rifle-rated steel targets are some of the best, but paper targets work well too. This kind of practice will help you learn what your range and situational limitations are.
Now, if you are shaking your head right now thinking that all of this practice is going to send you to the poor house, think again. Other than sighting-in, all of the shooting techniques that you’ll ever need can be practiced without spending a dime. You accomplish this through dry-fire practice. I know, I know—dry firing your gun will damage the firing pin. For modern center fire rifles, this idea is a myth. Don’t dry fire your rim fire .22 because damage will occur, but center fire rifles will have no issues. If you can’t bring yourself to do that, employ a dummy round designed for dry fire practice. They are relatively cheap and help some get over the worry.
Pick a target of similar size as your quarry, practice building your position, employing the fundamentals of marksmanship, and visualize each dry shot on your trophy of a lifetime. The only thing you are not getting is recoil. However, practicing dry and building that
muscle memory will help immensely when real bullets and real recoil enter the picture. As finances allow, mix in some real ammo and practice. A ratio of 70:30 dry practice/live practice will make you more proficient.
Live fire practice with a .22 is good practice as well and is quite inexpensive. Mix this in from time to time for variety.
Hunting at altitude in Colorado is an issue for the shooter. If you are not used to the altitude you are going to get winded quickly. While you are home, try to run around a bit, (or use a treadmill) then practice. This might sound silly, but I guarantee you are going to be winded from the walk. I also guarantee you a lot of walking! So, try to get used to shooting and steadying your rifle while out of breath. Remember proper trigger and breathe control. Don’t just yank on the trigger and hope for the best. Employing the fundamentals of marksmanship is even more important for this type of shot.
Most of us are not very good at estimating range. Knowing the range to your target is one of two external factors that plague many a hunting trip. Invest in a laser range finder and practice visual range estimation. Batteries die and rangefinders don’t always give you an accurate range due to lighting, rain, and other environmental factors. If you utilized the point blank zero method described above, you only need to know when the animal is farther than your established point blank range.
Wind is a huge factor that is often ignored. This subject could consume a few articles the length of this one! Suffice it to say that if wind is moving the limbs on the trees consistently and you have not invested lots of time and practice dealing with windy conditions, limit your shots to no more than 200 yards. A cross wind that strong at that range will cause your bullet to hit left or right of where you intended. You can mitigate the effects of the wind if you position yourself directly upwind or downwind of your target (but that might be difficult to accomplish in the hunting context). You could also try to wait it out and let the wind die down, but that is not always an option.
When in doubt, don’t shoot.
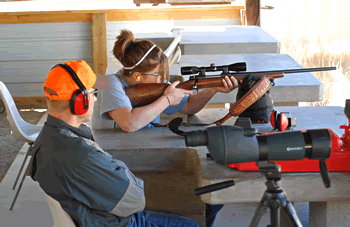 Hunt with a rifle that you shoot well. This is more important than having a magnum that will supposedly kill elk at 500 yards. People harvested animals just fine with muskets years ago before the newest fad of super-duper-mega-magnums were even around. You can shoot whatever you like as long as it meets Colorado’s requirements. Don't make the mistake of taking too much rifle that you don't shoot well. If you can't hit what you are aiming at, I don't care how big of a bullet you are putting down-range, it isn't going to do you much good unless you hit what you are aiming at. I can't stress this enough. Hunt with the rifle that you shoot the best and you are the most comfortable with.
More elk have probably been taken with the middle calibers over the years. Cartridges, like the .270, .30-’06, .280 and 7mm Mag, are popular and have moderate recoil that many people shoot very well. They also have plenty of punch to take animals cleanly within reasonable distances.
There are also a lot of options available to make your rifle easier to shoot. If your rifle doesn’t fit you properly, you can have a fitted stock made or a comb device installed. If the recoil bothers you, there are a few options here as well. You can also install a muzzle break that takes away about half of the felt recoil. However, they are really loud. You can also add a better recoil pad, such as the Pachmayr decelerator pad. A good recoil pad makes a big difference. Remember, too, that it will most likely be cool/cold out when you are hunting. The extra clothes you'll be wearing will soak up some of the recoil. Practicing the fundamentals and doing them in the field will also help manage recoil.
Bullet selection is more important in a lot of ways than caliber is. Pick a reliable expanding bullet that shoots well in your rifle. Some rifles "like" certain ammo more than others. Do the research and find a few bullets that you would like to try. Then take them out to the range and find out which ammo your rifle likes the best.
Let us not forget proper shot placement. Everything we have discussed thus far has been to help the hunter hit his target. Focus on the proper target/aiming point. The best shot is going to be in the heart/lung region, just behind the shoulder of a broadside animal. But not all animals present themselves broadside to the hunter.
It is the hunter’s responsibility to determine if a clean, ethical kill can be made given the presentation of the animal. Remember that heavy bone gets in the way as the animal is facing more toward the hunter, while more soft tissue and abdominal contents are exposed as it faces away. Think of the vitals like a yolk within an egg. You want to hit the yoke, so aim for it—not just some place on the surface. Emotions, the elements, and physical limitations will be working to make you miss. Work the fundamentals like you did in practice and you’ll be successful.
Work hard, dry fire until your fingers bleed, and good luck!

