Ice Fishing
A Guide To Successful Ice Fishing
In the realm of fishing, there is nothing more user-friendly or inexpensive than ice fishing! Over the past decade, the technology and quality of ice fishing equipment have advanced tremendously. And while there are benefits to having all the latest technology and gear, anyone can get out, fish, and compete with geared up anglers with just some basic equipment. I think that is why this sport is exploding across the country.
In Colorado, trout are an easy species for beginner ice anglers to target. Colorado Parks and Wildlife operates 19 hatcheries that breed, hatch, raise, and stock over 90 million fish per year, with trout being a large number of those fish.
Here are a few tips and tactics for making your day on the ice epic!
Ice Safety
In Colorado, ice conditions can vary from lake to lake. When you go onto the ice, you’re taking a risk. That’s why it’s important to check ice conditions and take safety precautions before heading out. Making an informed decision about whether it’s safe to walk or drive a snowmobile on ice can save your life.
Even on the same lake, ice thickness is not consistent. It depends on several factors, including location and type of lake. Here are some more tips for assessing ice:
- A shallow lake will freeze faster than a deep lake.
- The strongest ice is clear and blue. White or gray ice is much weaker. You should only consider traveling on clear, blue ice.
- New ice is stronger than old ice.
- Beware of ice around partially submerged objects such as trees, brush, embankments or structures as these objects can hold heat and weaken ice.
- Ice will not form as quickly where water may be warmed by sunlight.
- Drill test holes or use an ice chisel to help judge the thickness and character of the ice. Test holes should be at no more than 30 foot intervals.
- Beware of ice covered with snow. Snow acts much like a blanket, insulating thin ice and preventing the formation of clear, blue ice. Snow can also hide cracked, weak and open water.
- Use extreme caution when approaching a pressure ridge. Ice may be unstable up to 20 feet from the ridge itself.
- Stay away from cracks, pressure ridges, and slushy or darker areas that signify thinner ice.
- If ice is two inches or less, stay off.
- Four inches of good ice can support a walking individual.
- Six inches of good ice can support a snowmobile or ATV.
- Eight to twelve inches of good ice can support a car or small pickup.
- 12-15 inches of good ice can support a medium-sized pickup truck.
- Have a safety kit ready before you head out to the ice.
- Create an emergency plan with your fishing party and let friends or family know of your plan.
- Always carry ice picks or a set of screwdrivers on the ice that will float and are securely connected with a piece of nylon cord 24 to 30 inches long. Make sure you can quickly and easily access this equipment to give you better leverage on the ice should someone fall through it.
- Prepare 50 feet of nylon rope with a large loop tied to each end.
- Carry a wool blanket and a thermos of hot liquids.
- Anglers should carry a portable flotation cushion. The cushion will add to your seating comfort and give you something to throw should someone fall through ice.
- Attaching a long cord to sleds makes them easier to pull. If someone falls through the ice, have them grab the sled while you pull.
- Bring a cell phone or portable CB to call for assistance.
- The use of crampons, or cleats, for walking on ice is a good idea in Colorado. With the state’s powdery snow and wind, there is often no snow cover on ice. Blowing wind and snow polish ice to a glassy, slippery surface.
- If you or someone else should fall through the ice, know how to use these tools to perform a self rescue or assist in a rescue.
- Try not to panic.
- Turn toward the direction you came from.
- The safest place to pull yourself back up is the last place you stepped before you went through the ice.
- Place your hands and arms on the unbroken surface of the ice.
- Work your way up by kicking your feet, and use your ice picks to help pull yourself onto the ice.
- Once you are lying on the ice, roll away from the weak or broken ice. Don't attempt to stand up.
The first thing to do is stop. The rescuer needs to stay calm and have a plan. Use the following process to help you, the rescuer. Count to four:
- Who’s number one? Remember that you (the rescuer) are number one. You can go from rescuer to victim in a second. Keep yourself safe so someone is left to rescue the victim(s).
- What happened to the victim? How did they fall through the ice? Look at the ice around the victim. How do you keep from becoming a victim?
- Don’t get any on me. This step usually refers to keeping a barrier, such as latex gloves, between you and bodily fluids, but in this scenario, it applies to water.
- Are there any more? Is there more than one victim? Victims who are screaming can distract rescuers from victims who aren’t making noise.
This process only takes a moment and can save your life as well as the victim’s. When you are done assessing the situation, you can use the scenarios below to get the victim out of the water.
- If the victim hasn’t already used their ice picks or screwdrivers, remind them to make use of these tools.
- If the victim lost their ice picks/screwdrivers when they fell through the ice, toss them a floatation device. This can be a life jacket, empty water jug or any buoyant object.
- Reach the victim with a long pole, board, rope, blanket or jumper cables.
- Build a human chain in which rescuers lie on the ice with each person grasping the feet of the person in front.
- Once the victim is out of the water, tell them to roll away from the weak or broken ice; they should not attempt to stand up.
Hypothermia is caused by exposure to cold water or air that lowers body temperature. The body loses heat, particularly to its vital organs, at a rate faster than it can warm up. This cooling off of the body’s core can be fatal if it is not addressed in its early stages. Normal body temperature is 98.6 degrees Fahrenheit (37 degrees Celsius). Hypothermia will occur when the body’s temperature falls below 96 degrees Fahrenheit (or 35.5 degrees Celsius). This is a gradual process, and the initial symptoms of hypothermia may not be noticed. However, they often begin with confusion and difficulty thinking. The effects of hypothermia will last from three to 12 hours with treatment.
Older adults, infants, younger children and individuals who have low body fat may be at greater risk for hypothermia in cold temperatures. This is especially true if they have other illnesses or are on medications that may affect the body’s ability to regulate its core temperature.
There are several stages of hypothermia:
- Mild hypothermia: The individual may be shivering but is alert and coherent.
- Moderate hypothermia: The individual will probably be shivering but may abruptly stop; they may become irrational and experience a lack of coordination.
- Severe hypothermia: Shivering may or may not be present. Some victims may act combative, experience a sense of warmth, and attempt to remove clothing. Hiding from the rescue party has been observed with severe hypothermia, followed by unconsciousness. Extremities (arms and legs) must be moved very slowly to prevent blood that has cooled in the extremities from moving to the body’s core, which may result in cardiac arrest.
What to Look For
Call 911 immediately if you observe someone experiencing any of these symptoms:
- Difficulty speaking
- Slow, shallow breathing
- Shivering (older adults may not have this symptom)
- Exhaustion
- Irrational behavior
- Hallucinations
- Forgetfulness
- Dilated pupils
- Blue skin
- Confusion
- Rigid muscles
- Dizziness
- Nausea
If emergency services are not available, proceed as follows:
- If the person is not breathing, start CPR immediately.
- Keep the victim away from direct contact with the ground.
- Wet clothing (especially cotton) should be removed and replaced with dry clothing and/or blankets.
- Do not confine the person by wrapping a blanket around them; cover the person's head, but not their face.
- You may hold or lie next to the victim to transfer body heat.
- If possible, move the victim to a warmer location; this must be done very slow and gently.
- Don't apply direct heat or use hot water, heating pads or a heating lamp to warm the victim. Apply warm towels to the neck, chest wall and groin. Do not attempt to warm the arms and legs. Heat applied to the arms and legs forces cold blood back toward the heart, lungs and brain, causing the core body temperature to drop. This can be fatal.
- If the person is alert, give warm, not hot, liquids. If the person is vomiting, do not give food or liquids. Do not give the individual alcohol or try to force them to eat or drink. If the person is able to eat, they should have carbohydrate‐rich foods.
- Give the person a warm (not hot) bath if possible.
- Individuals with severe hypothermia should not walk and need to be treated at a hospital as soon as possible.
Preventing Hypothermia
With adequate preparation and packing, you can help to prevent hypothermia. Here are some guidelines:
- Carry a backpack equipped with a rain fly, or have a heavy-duty plastic bag to act as a waterproof cover.
- Bring a knife or small hatchet, a space blanket or a piece of plastic to use as a temporary shelter, a raincoat, hat or hooded sweatshirt and gloves, waterproof boots, and two pairs of wool or fleece socks.
- Keep hydrated. Drink plenty of nonalcoholic liquids. If the weather is cold, drink warm liquids.
- Pack a tin cup for heating water or melting snow.
- Have high‐energy food along for emergencies.
- Carry matches, a butane lighter or a magnesium fire starter.
- Dress in layers. Use an inner layer to wick moisture away from your skin; polypropylene or polyester is a good choice. Wool or fleece is good as a middle layer for insulation. The outer layer must be both waterproof and breathable so that it does not trap moisture or humidity inside the garment. Remember, you can always remove clothing if you get hot, but you can’t put on what you don’t have.
- If the outside temperature rises or if you are exerting a lot of energy, remove a layer or layers of clothing. Sweating increases the chances of hypothermia. Be sure your clothing is dry before putting it back on.
- Clothing and footgear should not be tight fitting as this will cut off circulation.

Lake Location and Water Depth
In general, across the western United States, productive trout fishing occurs in semi-shallow water (8-12 feet deep). So, how do you know you are fishing in 8 to 12 feet of water without a depth finder or graph? Go simple. When I started ice fishing, the options and availability of graphs were minimal and costly. My father used to take a 25’ construction tape measure and extend it down the hole to figure out depth. This seems a little odd but it worked great and we were always able to figure out depths and find the ultimate spot. Keep this affordable solution in mind if you do not own a graph.
To increase your odds of success, begin fishing adjacent to shoreline points or in areas in which the contour of the lake bottom transitions from shallower water to 8 to 12 feet. These areas typically gather fish looking to feed, a sure-fire win for success!
Timing
Trout will feed throughout the day but in my opinion, the earlier and later hours of the day are usually more productive. I break the day down into two-time slots and options for fishing opportunities. I consider the peak fishing windows to be from 6 a.m. to 10 a.m. and 2 p.m. to 6 p.m. Aligning your fishing around these times will increase your opportunities of putting fish on the ice.

Line, Lures and Presentation
Once you have found the ideal location, depth, and time of day, it is time to fish! As a tournament director, tournament angler, guide, and ice fishing pro, I recommend pairing the type and size of the fishing line with your lure. Use a fishing line that allows your jig to have full motion and is not hindered by line stretch or twist. For example, when using a small tube jig, I prefer to use green 4lb Trilene XL. This line is strong enough to handle a majority of the fish you will catch and gives you full control of the action of your jig.
Fishing Tips
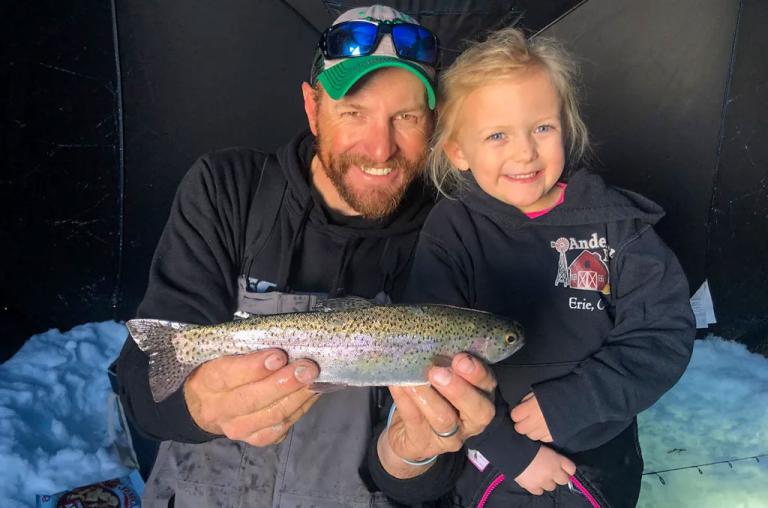
Ice Fishing Rainbow Trout
Join experienced angler Bryan Johnson and his friends as they fish for rainbow trout on 11 mile reservoir in South Park, Colorado.

Technique
I recommend beginning fishing approximately 6” to 10” off the bottom of the lake; however, I am not afraid to fish the entire water column. Many ice anglers miss opportunities to catch fish by solely targeting the bottom portion of the water column. I also pay attention to what jigging cadence attracts the fish and triggers bites. Next time you are ice fishing, try jigging for 30 seconds and then let the bait sit still for 1 minute. Think about the range or height of the jigging stroke. I like to keep my jig in a 4” to 8” window of movement to draw fish into the presentation and to make it easy for them to commit to biting the bait. Generally, it is a combination of the two styles, but whatever is producing the most bites, stick with it!
A very important element is to pay attention and observe what patterns are leading to your success. The excitement of getting a bite and catching a fish usually consumes us, and often, we forget about what we were doing or what we did to get the bite. Paying attention to those details so you can repeat it is one of the single most important things you can do.

Bait
There are limitless options of bait to tip your jig with but at the end of the day, I narrow it down to two characteristics: Scent and Size. I prefer to use baits that produce a scent in the water for at least 30 minutes and I do not want the bait to decrease the action of my jig. The two ultimate baits that I recommend are live wax worms or small cooked salad shrimp from the frozen food section of your local grocery store. Waxworms can be placed whole on the hook and I recommend using ¼ of the salad shrimp on the hook at a time. I use only these two bait options for trout.
See you out on the ice!

Need a Fishing License?
Annual fishing licenses are valid from March 1 through March 31 (13 months). CPW provides a range of options for anglers, from the annual fishing license to the one-day fishing license. Youth under the age of 16 fish for free.

Your Voice Matters
Sportsperson's Roundtable
Colorado Parks and Wildlife (CPW) depends on feedback and advice from our state’s hunters and anglers to make the best decisions about the management of fish, wildlife, and habitat. In order to discuss issues and gather ideas, CPW convenes a statewide Sportsperson’s Roundtable and holds regional sportsperson meetings. The Sportsperson’s Roundtable fosters information sharing between the hunting, angling and trapping community and CPW on issues that pertain to wildlife recreation and management in Colorado.
Stay Informed!
CPW Fishing Newsletter
Stay updated with Colorado's latest Fishing news! CPW's Fishing eNews provides information on regulations, special events, public access opportunities, and much more. Sign up today to become part of our community!